Archives for the month of: March, 2011

cast iron panCast Iron pans, oh how I love you!  I use my cast iron pans everyday-twice a day. I find them invaluable for their versatility and even, consistent heating. They are definitely in the top five of my most essential cooking tools. (In case you’re wondering, the other four are: a wooden spoon, big pot, sharp knife, and measuring cup.)

Cast Iron has been a basic and indispensable cooking implement for hundreds of years but I’ve come to realize a lot of folks are unfamiliar with basic care and upkeep. My Mom told me that she “ruined” the pans she received for her wedding by soaking them in water. I put “ruined” in quotes because you can actually revive rusted pans. The Kitchn has a great article on how to re-season your pans. Some basic rules for cast iron:

  • Keep it greasy! (well-seasoned pans are non-stick and have a shiny surface)
  • Don’t clean it with soap (it removes the seasoning)
  • Don’t put it in the dish-washer
  • Don’t use steel wool (use salt as an abrasive)

Cast Iron pans are pretty cheap, especially if you find one at a thrift store or yard sale. I just picked one up for $20 at flea market here in Berkeley. Plus, they’ll last a lifetime and can be passed on from generation to generation.

One of my favorite things to cook in my small cast iron pan in cornbread.  Cornbread cooks so evenly and browns beautifully in cast iron and it somehow feels more authentic (I imagine southern ladies of olden’ times making their cornbread the same way.)  The cornbread recipe that I’ve been using is both simple and delicious. It comes together quickly and is easy whip up while you’re in the midst of cooking the rest of your meal.

  • 2 cups cornmeal
  • 3/4 cup all-purpose flour
  • 3 tsp baking powder
  • 1 tsp salt
  • 1 1/2 cups milk
  • 2 eggs
  • 5 tbs melted butter
  1. Pre-heat oven to 400 F
  2. Combine all the dry ingredients
  3. In another bowl whisk eggs, milk, and butter together
  4. Combine the wet and dry ingredients until well-blended.
  5. Cook for 25 minutes (or until a knife comes out clean and the top is slightly brown)

My birthday was this past week and my sweetie took me out for a lovely dinner at Gather Restaurant in Berkeley. Gather specializes in local and organic Californian Cuisine that can satisfy everyone, from vegan to carnivore. With such a commitment to sustainability you might think they would be a little precious about their food (tiny servings, weird combinations) but Gather does sustainable gourmet that delights your taste buds and leaves you with a full belly and a smile.

Andrew and I split an appetizer, entree, salad, and dessert and It was more than enough food for us both. We started off with mushroom bruschetta which was surprisingly rich and extreamly flavorful.  For the main course we ordered roasted duck with pesto on a bed of duck sausage and pureed artichoke. The duck was so tender and the flavors so complex that I had to close my eyes to concentrate on the taste. The kale salad with roasted carrots, capers, and almonds was a perfect complement to the duck. For dessert we had hazelnut chocolate cake with cashew-cinnamon “ice cream.”  The meal was truly amazing and I enjoyed every mouthwatering bite.

Along with the amazing dinner we had a few fancy cocktails. Delicious dinner, yummy drinks and great company: what more could a girl want on her birthday? Dinner at Gather was real treat. If your looking for a nice evening out in the Bay Area, I recommend you give it a try!

Brunch

Sunday brunch is the best. Breakfast foods are my favorite and Sunday brunch is the one meal of the week that I can really indulge my love of pastries, eggs, and pancakes. This weekend my friends Justin and Katie were visiting from Seattle and I invited them over for brunch. It was the perfect opportunity to make a big-ass breakfast.

On the menu were banana bread muffins, soft boiled eggs, with strawberries, blood oranges, and raspberries. I’ve had my eye on a recipe over at Pinch My Salt for cheddar and parmesan scones and used this brunch as an opportunity to try them out. Boy, oh boy they were tasty. Not surprising when the main ingredients are cheese and butter. Plus! The scones have my favorite hot sauce in them: Sriracha. Really, its a winning combination.

It was a lot of food… but hey, brunch counts for two meals. Between the muffins, fruit, and spicy cheese scones there was a good balance of flavors and the variety kept the meal interesting. Good job, me.

We all ate our fill and then took a nice long walk around Berkeley. Brunch with friends is really a great way to spend a Sunday morning.

Banana brunch muffin

Ingredients

I’ve been tinkering with a banana bread recipe and I’ve got it where I like it. There’s just enough fruit and veggies in it to make it seem like a nourishing breakfast item, but it’s still breakfast cake in its truest form. Here’s the recipe I used for my muffins:

Banana Brunch Muffins

  • 3 or 4 ripe bananas, smashed
  • 1/4 cup shredded coconut
  • 1/4 cup sunflower seeds
  • 1 grated carrot
  • 1/2 cup dried cranberries
  • 1/3 cup melted butter
  • 3/4 cups sugar
  • 1 egg, beaten
  • 1 teaspoon vanilla
  • 1 teaspoon cinnamon
  • 1 teaspoon baking soda
  • Pinch of salt
  • 1 1/2 cups all-purpose flour
  1. Preheat the oven to 350°F (175°C).
  2. Mix butter into the mashed bananas in a large mixing bowl.
  3. Mix in the sugar, cinnamon, egg, and vanilla. Then mix grated carrot, cranberries, and sunflower seeds.
  4. Sprinkle the baking soda and salt over the mixture and mix in.
  5. Add the flour, mix.
  6. Pour into a greased muffin pan.
  7. Bake for 35-40 minutes. The muffins are finished when the fork comes out clean.

North Carolina with fork and spoonLiving in the Bay Area is amazing but I miss North Carolina. I was born and raised in North Carolina and moved to the Bay Area after college. The Bay Area has some of the best and most diverse food in the world, but to to remedy homesickness I make southern food. There’s nothing more comforting than fried chicken in my book.

I’m more of Southern chef now that I live in California than I ever was in NC. I never made cornbread or fried chicken when I was living in back home. (Granted, I didn’t do much cooking at all in college.) In NC, southern food is the norm; if anything, it’s harder to avoid than find. Here in the Bay Area it’s quite the opposite. Obviously, it’s not the South but there are a lot of us here! You would think it would be easier to find a good buttermilk biscuit in this town. Sheesh.

When I picked up my CSA box this week I was excited to see that collard greens were included. Then I noticed the potatoes and remember that I had some chicken in the fridge and I knew then what must be done… fried chicken, with collard greens, and mashed potatoes! Heck yes!

Fried Chicken

Did I mention I love fried chicken? Because I L-O-V-E fried chicken. After being a vegetarian for almost six years it was fried chicken that brought me back. I’m still learning how to fry chicken but I must say this was a pretty delicious attempt. The mash potatoes were creamy and soothing and the collards were the perfect complement. It tasted like home. My southern boy was happy too; he didn’t stop smiling the whole way through dinner.

What food reminds you of home?

A friend of mine recently turned me on to Kombucha, and man do I love it. Kombucha is a tangy, refreshing, and fizzy drink that is professed to be good for your health. There’s a myriad of claims about the drink: it’s supposed to be good for digestion, detoxify your body, and raise your energy levels. I’m not here to attest to any of those claims, but I do think it is an amazing beverage.

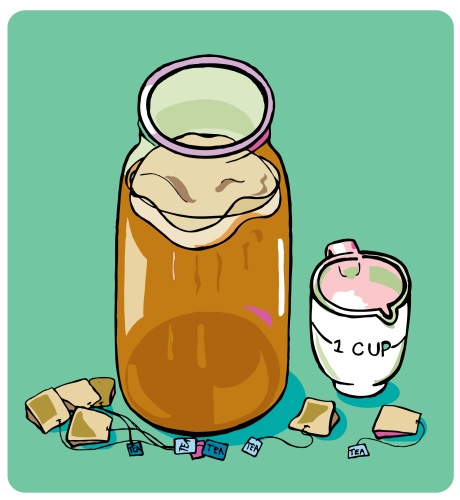
Kombucha BrewKombucha is fermented sweet tea that is cultured with a solid mat of yeast and bacteria known as a scoby (symbiotic colony of bacteria and yeast) or sometimes refereed to as the kombucha “mother.”  The Kombucha “mother” is a wonderfully icky thing that looks a lot like a jellyfish. The bacteria and yeast feed on the sugar and produce acid, so the final product is not sweet but tart.

There are several commercial brands of Kombucha on the market, but they’re pricey, usually $3.50-$5. After doing some reading on the subject, I decided to brew my own. Home-brewing Kombucha isn’t a complicated process. Once you acquire a scoby, all you need is sweet tea and some glassware. In my first batch, the Kombucha paid for itself. ($16 dollars of equipment for 7 bottles!)

Finding a scoby is a little tricky, I searched a few weeks before I found someone on craigslist to give me one (I traded a scoby for a painting.) You can order them online but I preferred to find one locally. Every time you brew a batch of Kombucha the “mother” culture forms a “daughter.” So after you finally hunt down a “mother” and begin brewing, you’ll end-up with more cultures than you can give away. The cultures propagate so quickly a friend of mine joked that he suspected Kombucha is actually an alien conspiracy to take over the world. (You really have to see these things, the scoby does look like a weird science experiement. My boyfriend doesn’t like to stand too close to the jar that’s brewing in our kitchen.)

If I haven’t scared you off,  here’s what you need to brew your own kombucha:

  1. Scoby or “mother”
  2. One gallon glass jar (Never use metal!)
  3. One gallon of good water
  4. Six tea bags: black, green, or white. (Don’t use the flavored stuff.)
  5. One cup sugar
  6. Cloth to cover the jar
  7. Bottles for the brewed Kombucha.

Here’s how ya’ do it: Make sure everything you use to brew and bottle is clean, clean clean!

How to do it

There are a vast number of tutorials and how-tos on the web, if you’re ready to brew. The Happy Herbalist has detailed the ins-and-outs of brewing. If you’re in the Bay Area, I’d be happy to share one my scobys with you! Just shoot me an email.

Have a great weekend everyone!

lacto fermentation

Back in the days before refrigeration and processed foods, folks preserved their vegetables through lacto-fermentation. Lacto-fermentation is a pickling process that uses beneficial bacteria to keep food from rotting. Believe or not you’re probably already acquainted with this process. Lactobacilli are used to make make yogurt and sauerkraut. Remember these guys from a few posts back?

lactobacilli

So it goes down like this:  you soak vegetables in salty water or you cover them with salt and this creates an ideal environment for lactobacilli. The lactobacilli do their thing, consuming sugars and producing lactic acid as a by product. This creates an acidic environment which kills off the bacteria that spoil food.  These bacteria are pretty good for you too; they help you digest the vegetable and promote a healthy flora in your intestines.

Lately, I’ve really been getting into lacto-fermentation. Since I’ve joined a CSA, I’ve had an abundance of veggies in my fridge and making pickles has helped me save them for later. This is essentially what our ancestors did whenever they had a harvest. So far, I’ve made diakon radish pickles, kimchi, preserved salted lemons, and yogurt.

veggies and milk

You can use this process to preserve any firm vegetable or fruit that doesn’t have too much water. So radishes and carrots are in; watermelon and tomatoes are out. You can add any spice you want, or throw in garlic and ginger if it strikes your fancy.

The kimchi and diakon radish pickles are wonderfully tasty. I’m really looking forward to trying the preserved salted lemons. They take a few weeks to ferment. I’ll let you know how they turn out!  In the meantime, if you want to make some for yourself here’s the basic guidelines:

Preserved Salted Lemons:

  1. Gather enough thin-skinned lemons to fill the jar you’re going to pickle in. (Citrus is ripe here in the Bay Area – I foraged the lemons I used from trees on my walk to work.)
  2. Wash the jar and clean the skins of the lemons.
  3. Quarter the lemons and liberally coat them in sea salt.
  4. Smash the lemons into the jar, sprinkle more salt between layers.
  5. When the jar is full, squeeze additional lemon juice into the jar to cover the slices.
  6. If you want to spice it up, add a cinnamon stick or a few peppercorns. Heck, why not both?
  7. Screw the lid on tight and sit in dark space for about a month.

preserved salted lemons

When it’s done, you eat the rind and use them like olives. Check out the Sprouted Kitchen’s beautiful post about preserved salted lemons. She has a more detailed how-to and links to recipes.  Happy Pickling!